
I need to make these. How wonderful would they be hanging in my back yard over the garden or swaying between the trees?
These are the instructions that I got from Design Sponge.
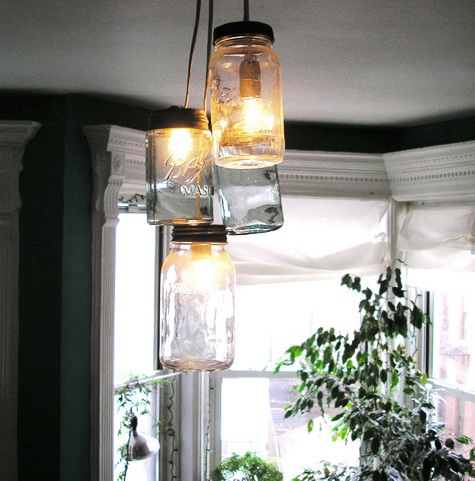
mason jar lights
what you’ll need:
-vintage mason jars
-hanging lamp kit with low wattage bulbs (try your local lighting store, home depot or lowes)
-ceiling light plate
1. punch holes in each mason jar lid, large enough to fit the light bulb cords through (appx. 1 inch). as always, be safe and use gloves and a steady hand when punching holes. to punch the hole you can use either a hammer and nails (which you’ll need to then widen for the cords) or a larger tool that you can tap through.
2. unscrew the lid, insert the bulbs into each jar, feeding the cord through the holes in the lid. whitney suggests using a lamp kit that includes tension clasps to keep the bulb from sliding.
3. tighten the lid back on the jar and adjust the bulb to its desired height (using the tension clasps).
4. using a store-bought ceiling light plate- drill holes into the plate to pull all of your cords through (depending on how many jar-lights you will be hanging). pull the lights through, allowing enough cord to hang the lights at your desired height, and then tie a knot at the top to keep them from falling back through the ceiling plate.
5. contact your local electrician to install the lights into your ceiling- we do not suggest trying to install these yourself unless you’re a trained electrician.
Read more at Design*Sponge http://www.designspongeonline.com/2008/06/diy-project-whitneys-mason-jar-lights.html#ixzz1B4zrA8ae
No comments:
Post a Comment